Image Manipulation Programs
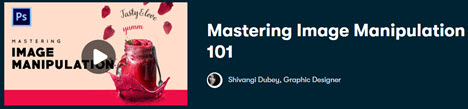
Mastering Photoshop Image Manipulation Like a Pro
More Information
One of the creative ways of bringing your imagination to life is by blending various images to create a composition. Mastering Photoshop image manipulation allows you to achieve that. The course walks you through the steps of combining various photographs in Adobe Photoshop, from selection and masking to final colour changes so that you can create eye-catching images from scratch. This skill can be applied to various products and creative works, including posters, commercials, movie sequences, wallpapers, and more. You will learn how to deal with adjustment layers, use the pen tool, and blend and mix multiple photos in the Mastering Photoshop Image Manipulation Like a Pro class. The platform provides a diverse selection of related courses. There are several courses to choose from. If you are new to Photoshop, there are several beginner courses to start with, such as the Photoshop 101 series, which includes Pixel Stretch Posters | Mastering the Selection. These lessons help you bring your imagination to life by allowing you to create something creative and realistic that can be turned into a venture that earns you extra income. Read more here...
Mastering Photoshop Image Manipulation Like a Pro Summary
Contents: Skillshare Online Course
Creator: Shivangi Dubey
Official Website: skillshare.com
Access Now
My Mastering Photoshop Image Manipulation Like a Pro Review

Furthermore, if anyone else has purchased this product or similar products, please let me know about your experience with it.
I feel totally comfortable and confident in recommending Mastering Photoshop Image Manipulation knowing it can be so helpful if you fully apply what they share.
Manipulating images with The GIMP
The GIMP is a free software program for manipulating photographs and graphical images. To create images with GIMP, you can either import a drawing, photograph, or 3D image, or you can create one from scratch. You can start GIMP from the system menu by selecting Graphics C GIMP Image Editor or by typing gimp& from a Terminal window. Figure 5-6 shows an example of The GIMP. The GIMP is a powerful tool for graphic manipulation. The GIMP is a powerful tool for graphic manipulation. In many ways, GIMP is similar to Adobe Photoshop. Some people feel that GIMP's scripting features are comparable to or even better than Actions in Adobe Photoshop. One capability that GIMP lacks, however, is native support for CMYK (cyan-magenta-yellow-black) separations. If CMYK is not critical for your graphics needs, you will probably find GIMP to be just as powerful and flexible as Photoshop in many ways. See for a CMYK plug-in for GIMP.
The GNU Image Manipulation Program
One of the best graphics clients available is The GIMP. The GIMP is a free, GPLed image editor with sophisticated capabilities that can import and export more than 30 different graphics formats, including files created with Adobe Photoshop. It is often compared with Photoshop, and The GIMP represents one of the GNU Projects' first significant successes. Many images in Linux were prepared with The GIMP. The GIMP can be found under the Applications, Graphics menu as simply The GIMP. You see an installation dialog box when The GIMP is started for the first time, and then a series of dialog boxes that display information regarding the creation and contents of a local GIMP directory. This directory can contain personal settings, preferences, external application resource files, temporary files, and symbolic links to external software tools used by the editor.
Manipulating images with GIMP
The GIMP is a free software program that comes with Fedora and RHEL for manipulating photographs and graphical images. To create images with GIMP, you can either import a drawing, photograph, or 3D image, or you can create one from scratch. You can start GIMP from the Applications menu by clicking Graphics The GIMP or by typing gimp& from a Terminal window. Figure 6-9 shows an example of The GIMP. Figure 6-9 GIMP is a powerful tool for graphic manipulation. Figure 6-9 GIMP is a powerful tool for graphic manipulation. GIMP 2.6 represents one of the most significant new releases of GIMP for some time. Many of the new features aim at improving the tools needed by professional designers. All new selection tools let designers select rectangular areas with rounded corners. A slider was added to let you more specifically select brush sizes. New grid and alignment features make it easier In many ways, GIMP is similar to Adobe Photoshop.
Photo Editing The GIMP
While many of the other programs introduced so far mirror the Windows look and feel in some way, The GIMP walks a different path. It has its own unique way of working, which takes a little getting used to. But it's very much worth the effort, because The GIMP offers photo-editing tools on par with professional products like Adobe Photoshop. It's certainly more than powerful enough for tweaking digital camera snapshots. To start The GIMP, select Applications Graphics GNU Image Manipulation Program. Once the program is running, you'll notice that it's actually little more than a large toolbar on the left side of the screen. Everything else that runs within The GIMP whether it's a For an in-depth look at The GIMP package, see Chapter 20. Figure 11-10. The GIMP Figure 11-10. The GIMP
The GIMP Image Editor
The GIMP image editor, available from the Applications Graphics menu (but see the section What's New in 10.04 on page 390), is an incredibly well-featured and powerful image editor, championed by many people as the Linux equivalent of Adobe Photoshop. It does take a little getting used to, not least because it divides its components up into separate windows on your desktop (see Figure 14-7). But if you are used to an environment in which your graphic editor takes up the entire desktop, and prefer not to be distracted by any other open windows, you may wish to click the bottom-left icon of your desktop to hide all open windows, and then click the tab in the bottom status bar representing the GIMP. This will ensure only GIMP windows are visible. Teaching you how to use an image editor as powerful as the GIMP is beyond the scope of this book, so you'll need to browse through the various menus and try out options to acquaint yourself with the program's full capabilities.
Image Editing Using GIMP

GIMP is an extremely powerful image editor that offers the kind of functions usually associated with top-end software like Adobe Photoshop. Although GIMP is not aimed at beginners, those new to image editing can get a lot from it, provided they put in a little work. The program relies on a few unusual concepts within its interface, which can catch many people off guard. The first of these is that each of the windows within the program, such as floating dialog boxes or palettes, gets its own panel entry. In other words, the GIMP's icon bar, image window, settings window, and so on have their own buttons on the Ubuntu desktop panel alongside your other programs, as if they were separate programs. Note GIMP's way of working is referred to as a Single Document Interface, or SDI. It's favored by a handful of programs that run under Linux and seems to be especially popular among programs that let you create things.
Printing from The GIMP
The GIMP offers by far the most control over printing. However, perhaps ironically, The GIMP needs extra configuration before it can print. This is because it assumes your printer is PostScript-compatible, which is not true of most nonprofessional printers. If you're in doubt about whether your model supports PostScript, check the documentation that came with your printer, as well as the packaging, and look for the PostScript logo. However, unless you specifically opted to purchase a PostScript-compatible model, it's unlikely the function will be supported. Note Many of the printer drivers used by the CUPS software originated within the GIMP-Print project (http gimp-print.sourceforge.net ), which was an attempt to bring high-quality printing to The GIMP image editor. Gimp-Print is now known as Guttenprint and has expanded to bringing high-quality printer drivers to all Unix Linux systems. Follow these steps to configure The GIMP to use your printer if it's not PostScript-compatible.
Using the GIMP to Resize Images and Convert File Formats
Like gThumb, the GIMP is also a very handy tool for resizing images. This can be done by simply right-clicking an image opened in the GIMP and then selecting Image Scale Image in the popup menu. This will bring up the Scale Image window, where you can set the new size of the image. The GIMP is also an excellent tool for converting images from one file format to another. You can, for example, open a bitmap (.bmp) file and save it as a PNG (.png) file, or save a JPEG (.jpg) file as a GIF (.gif) file, and so on. While this can also be done with gThumb, the GIMP supports an extremely wide variety of file formats, and it even lets you save an image file as a compressed tarball, which makes it a true file-conversion king. To perform a file conversion, just right-click an image opened within the GIMP and then select File Save As in the popup menu. You can make the same selection from the File menu if you prefer. Either way, the Save Image window will then appear.
What Does Photoshop Have That Isnt in the GIMP
Although The GIMP is powerful, it does lack two features Adobe Photoshop offers that are important to some graphics professionals. The first of these is the capability to generate color separations for commercial press printers (CMYK for the colors cyan, magenta, yellow, and key or black ). The GIMP uses RGB (red, green, and blue), which is great for video display, but not so great for printing presses. The second feature The GIMP lacks is the use of Pantone colors (a patented color specification) to ensure accurate color matching. If these features are unimportant to you, The GIMP is an excellent tool. If you must use Adobe Photoshop, the current version of CodeWeavers' CrossOver Office will run Photoshop in Linux. After the initial configuration has finished, The GIMP's main windows and toolboxes appear. The GIMP's main window contains tools used for selecting, drawing, moving, view enlarging or reducing, airbrushing, painting, smudging, copying, filling, and selecting color.
How To Install GIMP On Ubuntu Software Center Or Terminal
A while back decided to pull gimp out of the default install to make sure the install .ISO file would fit on a cd. You now need to install this if you would like to take advantage of this great tool. We will look at two methods on how to install gimp on ubuntu. Method one will be with the ubuntu software center in Ubuntu Unity. The second method will be to install it with a command in a terminal . They both accomplish the same thing so the choice is up to you what method you would like to use. Seach for Gimp Click On GIMP Image Editor This will bring you into the software center on the install page for GIMP. Click on the Ubuntu icon again and search for GIMP sudo apt-get install gimp Hit Y to confirm installing GIMP and its dependancies
The GIMP

The GIMP (which expands to either GNU Image Manipulation Program or General Image Manipulation Program and is often written with the definite article) specializes in image manipulation like the ImageMagick package described in the last section. But while ImageMagick's strength is batch processing, GIMP does everything via its GUI. The GIMP is often cited as one of the most impressive and successful products for Linux (and other Unix versions). People who use image manipulation programs professionally have said that while GIMP can feel a little bit awkward to use, it is functionally comparable to its commercial competitor from the Windows and Macintosh world, Adobe Photoshop. Some people even have called it the free alternative to Photoshop. GIMP draws its power from an amazing number of plug-ins that are available for it.
GIMP Basic Tools

The beauty of GIMP is that all of the tools you need to edit images appear in separate dialog boxes, allowing you to lay out multiple tools as you draw and have easy access to them while working. The main dialog box allows you to switch among the various tool dialog boxes while editing an image. Figure 10-5 GIMP's main dialog box, Figure 10-5 GIMP's main dialog box, The File menu item in the main dialog box allows you to open or acquire an image to work with. GIMP allows you to edit images by GIMP supports all of the standard image types, such as GIF, JPG, TIFF, and others. Figure 10-6 The GIMP Toolbox dialog box list. Figure 10-6 The GIMP Toolbox dialog box list. To demonstrate the abilities of the GIMP, let's get an image and play with it.
Sample GIMP Tasks
As I acknowledged earlier, I am not a graphics artist. Many people who are serious artists have created extensive sets of tutorials on using GIMP, and I'd be insulting them (and you) by either parroting those or by trying to pretend that I have major graphics skills. That said, I do use GIMP regularly for a variety of common tasks that you may find useful, so I'll discuss some of those in the next two sections. For tutorials on using GIMP to do serious graphics work, see some of the URLs in the section More Information About GIMP, later in this chapter. Taking Screenshots Using GIMP As you may have noticed so far, this book contains several screen captures that show the entire screen, specific windows, or certain portions of the screen. My graphics friends have finally convinced me that a picture is indeed worth a thousand words, or should at least accompany them. All of the screenshots in this book were done with GIMP, which is an excellent tool for screen and window captures.
Open Office Draw for Graphics
OpenOffice features a graphics program called Draw. While it is technically a vector program, it provides some of the bitmap functionality of programs such as The GIMP and could be classified as a beginner- to intermediate-level graphics program. It is well suited for combining text, shapes, lines, and images into a single document, and has a limited ability to do a wide variety of tasks that usually require a specialized program. While some of its features are not as refined as they are in programs such as The GIMP, the advantage is that they are combined in one program. So if you want to create a business card with a graphic, you can do it without moving back and forth between programs.
The Filesystem Hierarchy Standard FHS
The FHS furthermore recommends that software uses subdirectories of usr share and usr lib to guard against name clashes. These subdirectories are referred to as compartments in some places. For instance, architecture-independent files of the OpenOffice.org suite reside under usr share openoffice while the Gimp graphics programme may store such files under usr share gimp. Even if both programmes provide a file named tree.png, the packages can happily coexist.
Changing Running Processes
Nice -n -10 gimp Launch gimp at higher priority In the following sequence of commands, we start the GIMP image program from a Terminal window. After that is a series of control keys and commands to stop and start the process and move it between foreground and background gimp Run gimp in the foreground 1 + Stopped gimp gimp gimp & gimp &
Using Scanners Driven by SANE
SANE is now included with the Fedora and RHEL distributions. The sane-backends, sane-frontends, xsane, and xsane-gimp packages are all on the DVD that comes with this book. You xsane This is an X-based graphical front end for SANE scanners xsane can work as a GIMP plug-in or as a separate application. (From the Applications menu, select Graphics Scanning.) It supports 8-bit output in JPG, TIFF, PNG, PostScript, and PNM formats. There is experimental 16-bit support for PNM (ASCII), PNG, and raw formats.
The Ubuntu Linux GUI Tool

The options in the New Printer window display detected devices, as well as standard options for CUPS connections to network printers. The Gutenprint options are associated with The GIMP, which is the functional Linux equivalent to Paint Shop Pro. The standard LPT 1 option shown in the figure assumes a connection through the first parallel port, associated with dev lp0. Other options as shown in Table 7-5 should be familiar from your reading of the other Ubuntu Linux GUI print managers. Device URI, usually a device file associated with the brand, such as hp dev lp0. Access limited to The GIMP.
Available Desktop Environments
GNOME GNOME is built atop the GTK widget set, which was originally developed for the GNU Image Manipulation Program (GIMP) graphics utility. Since version 1.2, GNOME has used Sawfish as the default window manager (GNOME 1.4.0.6 is current at the time of writing). In any version, you can easily reconfigure GNOME to work with other window managers, although some integrate better with GNOME than do others. GNOME features an ever-increasing number of mini-applications and configuration modules. It's currently the favored desktop environment on Red Hat and Debian systems. You can learn more at http www.gnome.org .
Wubi Installing Ubuntu or Kubuntu on Windows

Versions of the Ubuntu and Kubuntu Desktop CDs prior to version 8.04 provided a variety of open source software packages that were compiled for Microsoft Windows systems, enabling Windows users to try out some of the amazing software that they could see and use after booting from the Desktop CDs in Live CD mode. These packages included Mozilla Firefox, Mozilla Thunderbird, the GIMP image creation and editing package, and several others.
Shrink or enlarge images at the command line
GIMP can do just about anything to an image but it can be time-consuming to fire it up just to resize an image. For ultra-quick manipulation, consider Imagemagick, a command-line image manipulation program. It doesn't come installed by default and you'll need to install it via Synap-tic (search for and install imagemagick). Once installed, the convert command should be used with the addition of the -resize command option. For example, the following will shrink filename.bmp to half its original size For more command-line image manipulation fun, see Tip 154, on page 197 Tip 214, on page 248 and Tip 268, on page 306.
Linux and Your Digital Camera

When your images are on your computer, feel free to run them through The GIMP to enhance them. The GIMP can reduce red-eye problems, crop your photos, change colors, brightness, and contrast, and otherwise doctor up your pictures. See the next section for more fun with The GIMP.
Open Source Office Suites
The heart of Gnome Office is the spreadsheet, Gnumeric. This is a Gnome project designed to create a full-featured GPL spreadsheet. One of its goals is to clone the look and features of Microsoft Excel. AbiWord is Gnome's word processor. It doesn't have all the features of many of the other word processors, but it is very fast and has a clean interface. Gnu Image Manipulation Program (GIMP) was one of the first open source desktop applications available for Linux. GIMP is a photo and image retouching program similar to Adobe Photoshop. While its interface isn't quite as polished as Photoshop, GIMP is every bit as powerful. Dia is a drawing program similar to Visio. Dia is is quickly becoming the tool of choice for Gnome developers to do diagrams and flowcharts. Eye of Gnome (EOG) is a quick image viewer. It was designed to allow developers to quickly view image files without having to open them in a larger application like GIMP.
Color Picker Bucket and Gradient

The pencil, paintbrush, and ink tools draw in the foreground color. Choose a size and type of brush to use from the Brush dialog menu. Note that the ink tool is a new tool, beginning with version 1.2 of The GIMP. The pencil, paintbrush, and ink tools draw in the foreground color. Choose a size and type of brush to use from the Brush dialog menu. Note that the ink tool is a new tool, beginning with version 1.2 of The GIMP.
Proprietary File Formats
Linux also has proprietary file formats, or at least formats for which support outside of the Unix world is rare. The GNU Image Manipulation Program (GIMP), for instance, uses its own file format, as do most Linux word processors. These file formats are all well-documented, but the big commercial players are, by and large, uninterested in
Editing the Image File

Now let's open our saved image file and play around with GIMP's image-editing features. 1. Select File O Open and select the image file you saved from your screenshot. GIMP opens the file in an image-editing window, as shown in Figure 10-8. Figure 10-8 The GIMP Image Editing window. Figure 10-8 The GIMP Image Editing window. GIMP Change Foreground Color dialog box. These steps demonstrate the basic image-editing capabilities of GIMP. If you're familiar with basic image-editing tools like Microsoft Paintbrush, you're probably happy with these results. However, if you're used to more advanced image-editing tools, you're probably not all that impressed yet. Fortunately, there are still more features in GIMP we can play with. GIMP includes a set of prebuilt filters that can apply special effects to your image. Now you're starting to see some of the fancier features of GIMP. But wait, there's even more.
Rsh rlogin and telnet

In normal operation (runlevel five, graphical mode), every Linux workstation is an X server to itself, even if it only runs client applications. All the applications you are running (for example, Gimp, a terminal window, your browser, your office application, your CD playing tool, and so on) are clients to your X server. Server and client are running on the same machine in this case.
Creating Your Own KDE Theme
Start creating graphics using GIMP or another bitmapped drawing program. Use the graphics that come with a downloaded KDE theme to see the size that you'll need for title bars, buttons, Panel backgrounds, and so on. Many good graphics programs in Linux can be used to create new theme elements and screenshots of your theme. GIMP and XV are included in most Linux distributions. The KDE paint program, kpaint, is included with KDE and is described in Hour 17, Using Graphics Utilities in KDE.
Taking a Screenshot
GIMP provides a method for capturing screen images. You can capture a single application window, an area that you specify, or the entire desktop. 1. Open GIMP by choosing Applications O Graphics O GIMP Image Editor. 2. From the GIMP menu bar, choose File O Create O Screen Shot. The Screen Shot dialog box appears, as shown in Figure 10-7. Figure 10-7 The GIMP Screen Shot dialog box. Figure 10-7 The GIMP Screen Shot dialog box. You can select to capture either a single application window or the entire desktop. You can also set a delay for when GIMP takes the screenshot, allowing you time to set up the window the way you want before taking the picture. 3. When the screenshot is taken, GIMP opens the image in an image editing window. Select File O Save As to save the image file. GIMP allows you to save the image in most common image formats. All you need to do is place the proper image format extension on the filename (such as .jpg, .tiff, .gif, or .bmp).
Using a Scanner
KDE 3-based Kubuntu systems install Kooka (http kooka.kde.org ), which is an excellent scanning package, although it has been dropped from KDE 4. On KDE 4-based systems, you can install the kdegraphics package to get the KDE SANE libraries, but they really won't do you much good at the moment. At the time that this book was updated, your best bet on a KDE 4 system is to install XSane, which also installs the GIMP. You can then follow the process described in the Using a Scanner on a Ubuntu System section (coming up next) to use your scanner on your Kubuntu 8.10 or better system. Don't worry I'm sure that someone somewhere is working on a killer scanning application for KDE 4. Let me know if you find one I'll certainly be looking too.
Applying Filters

Like other image-editing programs, GIMP includes many filters to add dramatic effects to your images. Filters are applied either to the currently selected layer or to a selection within the layer. To apply a filter, right-click the image and choose the relevant menu option. If you don't like an effect you've applied, you can reverse it by selecting Edit Undo, or by pressing Ctrl+Z. Noise This collection of filters is designed to add speckles or other types of artifacts to an image. These filters are offered within GIMP for their potential artistic effects, but they can also be used to create a grainy film effect simply click Scatter RGB. Generic In this category, you can find a handful of filters that don't seem to fall into any other category. Of particular interest is the Convolution Matrix option, which lets you create your own filters by inputting numeric values.
Image Magick

Another powerful graphics manipulation program is ImageMagick. This program limits you to creating simple graphics as compared with Gimp. However, ImageMagick does enable you to make changes to existing graphics, which is its real power. If all you ever need to do is manipulate images by cropping, resizing, rotating, or other such procedures, then look no further.
The Packages
Gimp Contains the GIMP image manipulation program, which can be used to retouch photos, create images, and work with images. gimp-data-extras Contains patterns, gradients, and other graphical elements to use with the GIMP program. gimp-devel Contains libraries and header files needed to develop GIMP plug-ins and extensions. gimp-perl Contains libraries used for communications between GIMP and GIMP Perl extensions and plug-in programs. glade Contains software for developing quick user interfaces for the GTK+ toolkit. glib Contains the Glib library of common utility functions used to avoid portability problems. glib-devel Contains static libraries and header files to support the GIMP Xlibrary. glib2 Contains the beta version of the next release of the glib package. gtk+ Contains the GIMP graphical toolkit for building graphical X applications. gtk+-devel Contains the gtk+ development tools for create applications that need the GIMP toolkit.
GNOME Graphics Tools

The GNU Image Manipulation Program (GIMP) is a sophisticated image editing application much like Adobe Photoshop. You can use GIMP for such tasks as photo retouching, image composition, and image authoring. It supports features such as layers, channels, blends, and gradients. GIMP makes particular use of the GTK+ widget set. You can find out more about GIMP and download the newest versions from its Web site at http gimp.org . GIMP is freely distributed under the GPL.
Adding MIME Types
When creating a KDE link for an application, use the f parameter to launch the application. Otherwise KDE canft automatically launch the application when you click on a data file with the new MIME type that you define. For example, to start GIMP, use this command in the Execute tab of the KDE link definition gimp f A key part of fully integrating other applications with KDE is defining the data types that those applications work with so that KDE can tie together the application with the files that it can operate on. For example, if you want to integrate the GIMP graphics program, you should make several additional graphics formats supported in KDE.
Welcome to Picasa

WHAT ABOUT GIMP You might have noticed that installing Ubuntu also installs an application called GIMP Image Editor in the Graphics group (refer to Figure 8-3). Why would you want to download, install, and use Picasa instead of the built-in GIMP Well, one of the main reasons why I recommend Picasa is its simplicity (and the fact that it's free). GIMP is an amazing application, and all the things you can do with Picasa (cropping, removing red-eye, and more) can be done with GIMP, but not as easily (in my opinion). Entire books have been written on using GIMP. (For me, Apress publishes the best book on the subject Beginning GIMP, 2nd Edition, by Akkana Peck.) It's one of the most powerful image editing applications available and it's 100 percent free. Feel free to open it up and play around.
Quick Takes

GIMP's shallow history and two alternatives that aren't as gimped as GIMP. dan sawyer For years now, I've been using The GIMP for the most of my postprocessing work. GIMP frequently may be maligned for its un-Photoshop-like interface and its utilitarian approach to filters, but I've grown to love it precisely for these reasons. During its 2.x release cycle, GIMP has outgrown a lot of its early awkwardness. It is now more memory-efficient, and its new features, such as improved font handling, keep it looking fresh and chipper. But, under the hood, it truly is becoming gimpy, because its core is hobbled by design. The problem started as a political one. Once upon a time, Rhythm and Hues submitted a set of patches to GIMP that gave it high-color depth capability (a necessity for retouching movies). But GIMP, still in the 1.x release series, didn't know what to do with it, and it rejected the patches out of hand. The patches were primitive and didn't seem important anyway.
Scanning Pictures

Once the scanner has been set up in YaST, you can scan pictures using either the XSane program or The GIMP If you use The GIMP the scanned images will be imported for image editing. In both cases, the same XSane core components are used. To start XSane from within The GIMP, start the program and click File Acquire XSane Device Dialog.
Creating Graphics

I created the Penguin Warrior spaceship model in the shareware AC3D modeller (http www.ac3d.org)3 and rendered it at various angles in the free POV-Ray 3.1 raytracer (http www.povray.org ). I drew the starry background in The GIMP. Though these aren't professional-quality graphics, they serve their intended purpose, and I had fun creating them.
Dynebolic
Tools included with Dyne bolic include MuSE, TerminatorX, GDam, SoundTracker and PD (for mixing and streaming audio). Video editors include Kino, Cinelerra and LiVES. For 3D modeling, there is Blender. For image manipulation, Dyne bolic includes GIMP. Bluefish is included for creating Web pages.
Sodipodi

The GIMP, like other so-called paint programs, creates bitmap images in various file formats. These are images in which the location and color of every single pixel is recorded. The image is essentially a collection of dots, or bits. The file you create is a rather hefty map of these bits (hence its name), and this map tells your system where everything in your image is supposed to go when it is displayed or printed.
More Products
| Photo Editor X with GIMP Tutorials |